Everything has security, be it business or personal. Be it our business or private matter, safety is essential. Because if we ignore the security of our things or business. Then we can face tremendous losses.
So you must ensure and maintain the security of your website. And if you are looking for a quality security plugin for your website to protect against server attacks.
Then I would say the Wordfence security plugin will be your best plugin.
So, today I will share this article What is wordfence security plugin? , How to Set Up Wordfence Security Plugin and How to Get Wordfence Premium Plugin for Free by ThePromoDeal
What is Wordfence?
Wordfence is a WordPress security plugin that provides security monitoring of WordPress websites. Protects your website from security threats like malware, hacking, DDOS, and brute force attacks.
Wordfence is a mighty popular security plugin. Wordfence includes all kinds of security features that can completely protect your website.
Wordfence has over 2 million customer active installations.
How it Protects Your WordPress Site?
Wordfence scans and filters all traffic to your website and blocks its IP if it detects anything suspicious.
A powerful feature of the Wordfence plugin is the malware scanner. Malware Scanner scans all your website files, plugins, and themes and uploads folder changes of suspicious code.
You can use the Wordfence plugin for free. But Wordfence is a premium plugin. Wordfence offers several security tools for free and may not fully protect your website.
However, if you use premium Wordfence, you get access to some of their unique features that will make your website more secure. Timely updating of firewall rules, country blocking, etc
How to Setup wordfence security plugin
Wordfence is very easy to set up and a great plugin. Today I will show you how to correctly set up the Wordfence plugin on your website. Follow the steps below
1. Install and activate the plugin
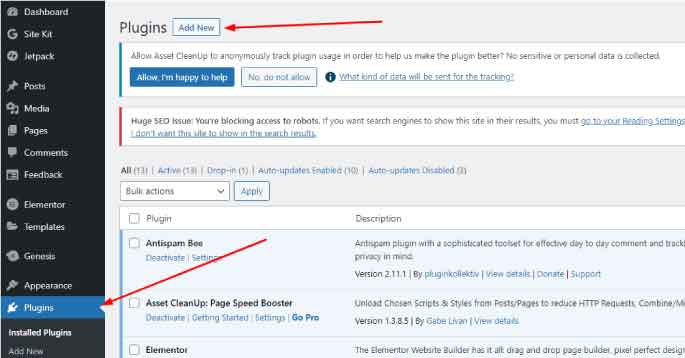
First, log into your WordPress dashboard. Then click on the “Plugins” button. Above you will see the “Add New” button. Click here

Then type “wordfence security plugin” in the search box. Notice in the image below what the Wordfence plugin logo looks like. Then click on Install Plugin and Activate.
You will then be asked if you want to receive any updates in the form of email notifications. If you agree, then submit an email. And if you disagree, then you can skip it as it is optional.

2. Configure your Wordfence security plugin
First, click on the Wordfence option. Then you will see a little below “global option” click here.

After that, some setting options will appear in front of you. Shoot the settings as you wish

3. Scan your WordPress site using Wordfence Scan
To scan your website, click the “Scan” button under the Wordfence option on the left of the WordPress dashboard.
Then you can see in the interface, click on the “strat new scan” button and wait for the complete scan

Wordfence Scan is a great feature that looks for changes in the size of your WordPress website’s core files. If it finds anything suspicious, it blocks them, and the backdoor searches deeper into malicious URLs and known infection patterns.
These Wordfence scans are very powerful and require large servers to run. How long this scan takes depends on your website’s data and server space.
4. Set up Wordfence firewall settings and learn about firewalls
Wordfence is a PHP-based firewall application. So the Wordfence WordPress plugin acts as a firewall plugin. A two-layer firewall provides protection.
So, the firewall will also load when the WordPress plugins are loaded. A firewall will protect your website. But WordPress themes and plugins will miss threats because these plugins trigger before loading.
Below is how to set up enhanced firewall protection. Click the “Firewall” button under Wordfence.
Wordfence will perform a scan to detect the firewall server configuration. If the scan results are different, you can choose a different one.
Then click “Continue.”
Next, it will ask you to download the current .htaccess file so that you can keep a backup of the file. Then click “Download” and click the “Continue” button to download the .htaccess file.
Next, your .htaccess file will be updated and allowed to run before WordPress. Now you will see the security level as ‘Enhanced Security’ on the firewall page.
When you install the Wordfence plugin, it will try to teach you the new status. You may notice a “Learning Mode” button on how to use the Wordfence plugin.
And how you interact with Wordfence with WordPress. So Wordfence will automatically switch to “Enable and Protect” after a week.

5. Block suspicious IPs and monitor activity using Wordfence
Click the Tools button under Wordfence. Then you can see the Live Traffic page. From the “Live Traffic” page, you can see the list of all requesting IPs.
You can easily block entire networks and individual IPs on the “Live Traffic” page or even manually block suspicious IPs.

6. Two-factor authentication setup
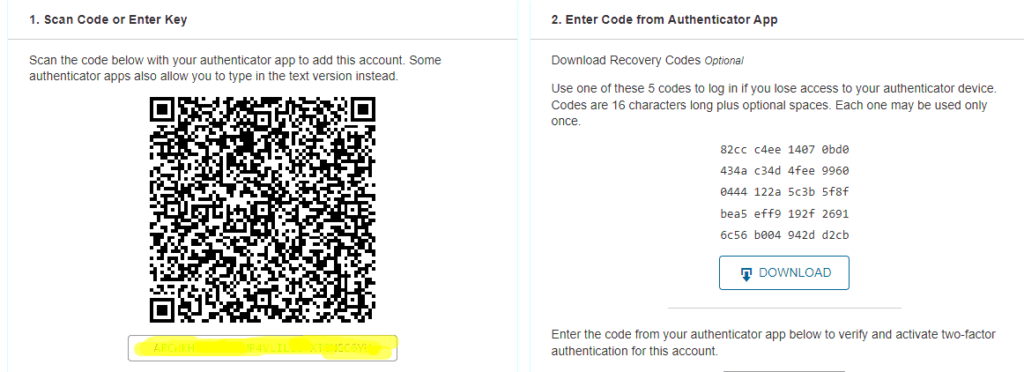
Wordfence can set up additional login security if you want. Wordfence allows you to set up two-factor authentication. On this page, you can see two methods you can use to set up two-factor authentication.

The finishing touch
Before starting any business, we must think about its security first. Because if the security of your business is not there, then there is a chance of losing your business.
The websites of today’s world have to suffer mostly due to security reasons because there are people who don’t like your personal life and want to harm your professional life.
Some hackers target many websites to steal valuable data from your website or cause your website downtime.
And if your website has downtime or data is stolen, you can suffer huge losses. That’s why the Wordfence WordPress plugin is an important plugin that will secure your website. Protects against hacker attacks.
Also, we regularly review products with lifetime deals.


